Google Firebase Analytics
Google Firebase Analytics helps you understand what your users are doing in your app. It has all of the metrics that you’d expect in an app analytics tool (average revenue per user (ARPU), active users, retention reports, event counts, etc.) combined with user properties like device type, app version, and OS version to give you insight into how users interact with your app.
Create a Firebase Project in the Firebase Console
Refer to the Firebase documentation for
Android
iOS
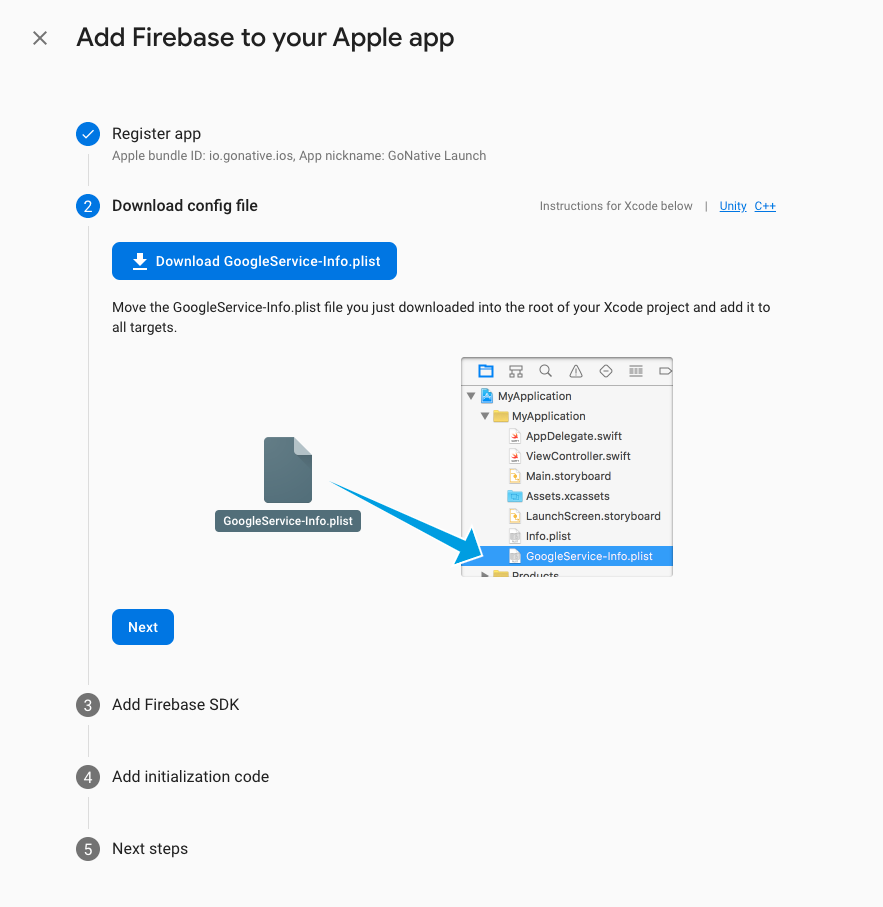
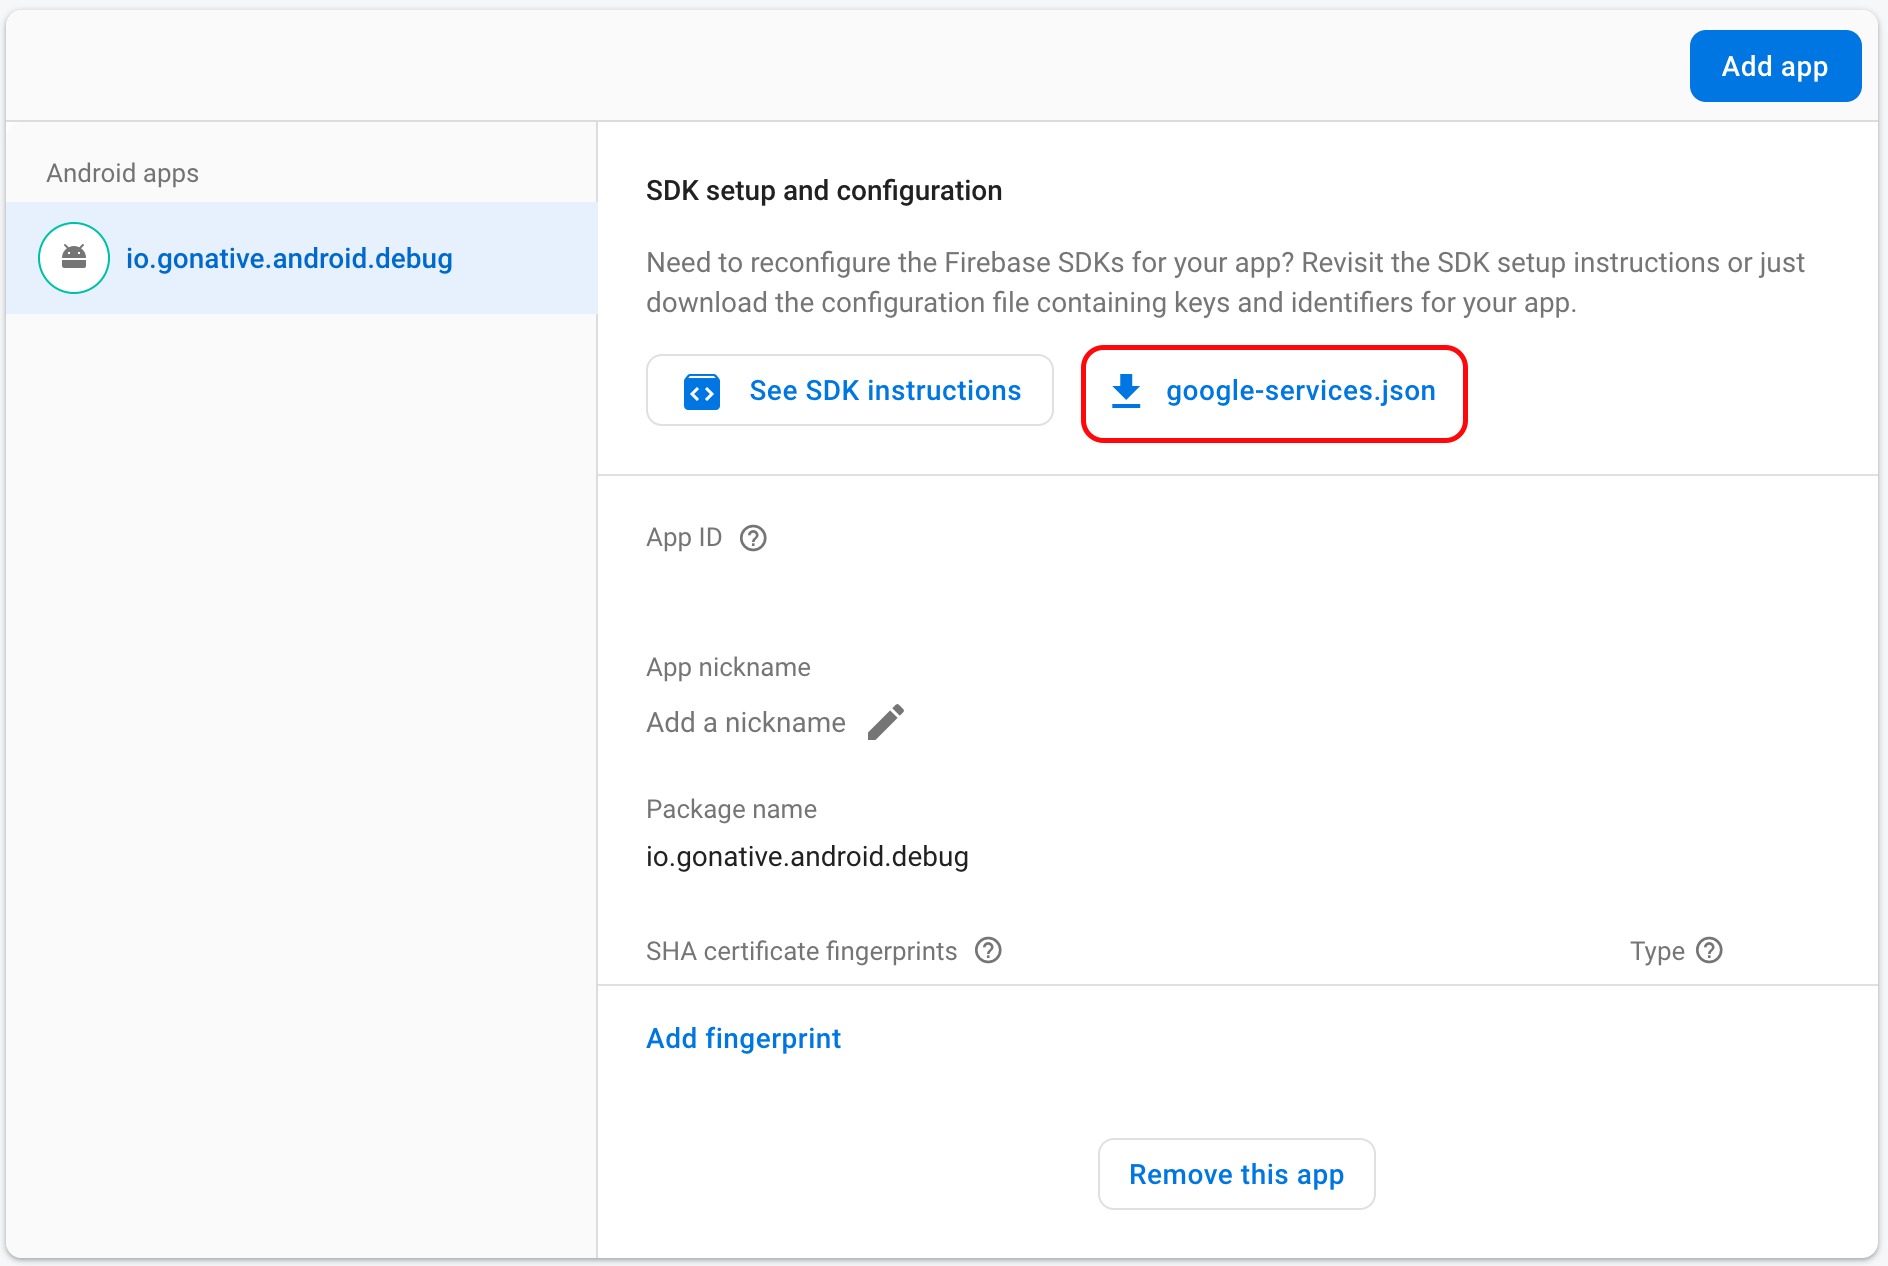
Follow steps 1 through 3 to set up a project in the Firebase Console. In summary you will provide your Package Name or iOS Bundle ID to then generate a GoogleService-Info.plist file for iOS and a google-services.json file for Android (if you are only deploying to one platform you only need to follow the instructions that are applicable).
Rather than following the steps to add these files to your app locally add the file contents directly to your app on our online build platform.

GoogleService-Info.plist file for iOS

google-services.json file for Android
Default logging
By default, Firebase tracks common app events including first_open_time, session_start, screen_view.
For a comprehensive list of automatic events refer to the
Google Analytics documentation.
Advanced logging
Use the Median JavaScript Bridge to log additional events through your website.
JavaScript Helper Functions
To simplify use of web-based Google Analytics in the browser and native Firebase Analytics in your app we recommend implementing JavaScript helper functions as outlined here: https://median.co/docs/detecting-app-usage#javascript-helper-functions
↔️Median JavaScript Bridge
- Call firebaseAnalytics.setAnalyticsCollectionEnabled(boolean)
Enable/disable all event logging including "automatic" app events. Logging is enabled by default and thus an initial call would be to disable logging by setting to
false. The effect of the function is persistent and once disabled logging can only be re-enabled by invoking the function again.median.firebaseAnalytics.event.collection({'enabled':BOOLEAN});
- Call firebaseAnalytics.setUserId(String)
median.firebaseAnalytics.event.setUser({'ID':STRING});
- Call firebaseAnalytics.setUserProperty(StringKey, StringValue)
median.firebaseAnalytics.event.setUserProperty({'key':STRING, 'value':STRING});
- Call firebaseAnalytics.setDefaultEventParameters(params)
median.firebaseAnalytics.event.defaultEventParameters(data);
//data is an object of key-value pairs converted into bundle params
- Call firebaseAnalytics.logEvent(eventName, params)
median.firebaseAnalytics.event.logEvent({
  'event':STRING,
  'data': OBJECT
});
//called with the fixed screenClass="MainActivity"
- Call firebaseAnalytics.logEvent(FirebaseAnalytics.Event.SCREEN_VIEW, bundle)
median.firebaseAnalytics.event.logScreen({'screen':STRING});
- Call firebaseAnalytics.logEvent(FirebaseAnalytics.Event.VIEW_ITEM, itemBundle)
median.firebaseAnalytics.event.viewItem({'data':JsonProductItem, 'currency': STRING, 'price': FLOAT});
// JsonProductItem is an encoded map of ProductItem*
// currency is the 3-letter currency code in upper-case
// price is the cost per item in the given Currency
- Call firebaseAnalytics.logEvent(FirebaseAnalytics.Event.ADD_TO_WISHLIST, bundle)
median.firebaseAnalytics.event.addToWishlist({'data':JsonProductItem, 'currency': STRING, 'price': FLOAT, 'quantity': INTEGER});
// JsonProductItem is an encoded map of ProductItem*
// currency is the 3-letter currency code in upper-case
// price is the cost per item in the given Currency
// quantity is the count of the product. It multiplies the price for the total amount.
- Call firebaseAnalytics.logEvent(FirebaseAnalytics.Event.ADD_TO_CART, bundle)
median.firebaseAnalytics.event.addToCart({'data':JsonProductItem, 'currency': STRING, 'price': FLOAT, 'quantity': INTEGER});
// JsonProductItem is an encoded map of ProductItem*
// currency is the 3-letter currency code in upper-case
// price is the cost per item in the given Currency
// quantity is the count of the product. It multiplies the price for the total amount.
- Call firebaseAnalytics.logEvent(FirebaseAnalytics.Event.REMOVE_FROM_CART, bundle)
median.firebaseAnalytics.event.removeFromCart({'data':JsonProductItem, 'currency': STRING, 'price': FLOAT, 'quantity': INTEGER});
// JsonProductItem is an encoded map of ProductItem*
// currency is the 3-letter currency code in upper-case
// price is the cost per item in the given Currency
// quantity is the count of the product. It multiplies the price for the total amount.
*Note:
ProductItemmay include the following fields. All fields are optional though it is recommended to provide at least anitem_idoritem_name.String item_id String item_name String item_category String item_variant String item_brand String item_list_name String item_list_id double price
Updated 10 months ago